

When I first started making cosplay outfits, armor always seemed like a very difficult thing to make. It requires materials other than fabric and, in a way, making armor requires a different mindset than sewing clothing. But, what I want people to understand with this tutorial, is that armor ISN’T something that you should be intimidated by! It’s 100% possible for even novice costumers to make armor! Worbla is also a material that I don’t think people should be scared of. With a bit of practice, there’s absolutely nothing you won’t be able to make. You are limited only by your imagination!
And when it comes to cosplay, it isn’t about the having the most expensive materials or tools, or have extensive experience with costume-making. The most important component of any costume is PATIENCE and the determination to get it done! A lot of people might look at this tutorial and think – Ugh, your costume is shit. Maybe it is, I’m new to this whole armor thing and I certainly still have a lot to learn. But I’m a firm believer that costumes are more than just the sum of their parts. I’m not a professional – often I have to use creative methods to get stuff done. What makes a cosplay good is that it looks cleanly constructed and well-put together once the whole thing is on your body. I also made this costume in FOUR DAYS. If I can do this in four days, anyone can make armor costumes!
I think it’s really important for cosplayers to share their experiences with others. We all start somewhere and I really admire the cosplayers out there who take the time to document their work and make tutorials that help other people learn. With that, here is an annoyingly detailed look at how I made my Skeletor costume! <3
Lady Skeletor Materials:
- Worbla
- Craft Foam
- Wood Glue
- Spray Paint (purple and gold)
- Acrylic paint (in silver, black, and white)
- Heavy Duty Snaps and Snap Tool
- Elastic bands
- Gemstones (in red and yellow)
- Heat Gun OR Hair Dryer
- Scissors
- Paint brushes (both small and large)
- Purple fabric (for the hood/cowl)
- Black fake leather (vinyl, pleather, etc, for the loincloth strips, shorts, and gloves)
- Super glue and tacky glue
** Let me apologize in advance for not having images of each of these steps. The next tutorials I make will be better documented! **
1) FORMING THE BREAST PLATE
Worbla is a type of moldable thermoplastic that is fairly thin and easily shape-able when heat is applied. You really only need the heat from a hair dryer, though heat guns can also be used to heat the Worbla faster. You can buy Worbla from CosplaySupplies.com.
I have made several breast plates with Worbla before (Lady Dr. Doom, Athena, Skyrim, and Lady Skeletor). There are several ways to make breast plates from Worbla and Google will be a helpful tool for discovering different methods.
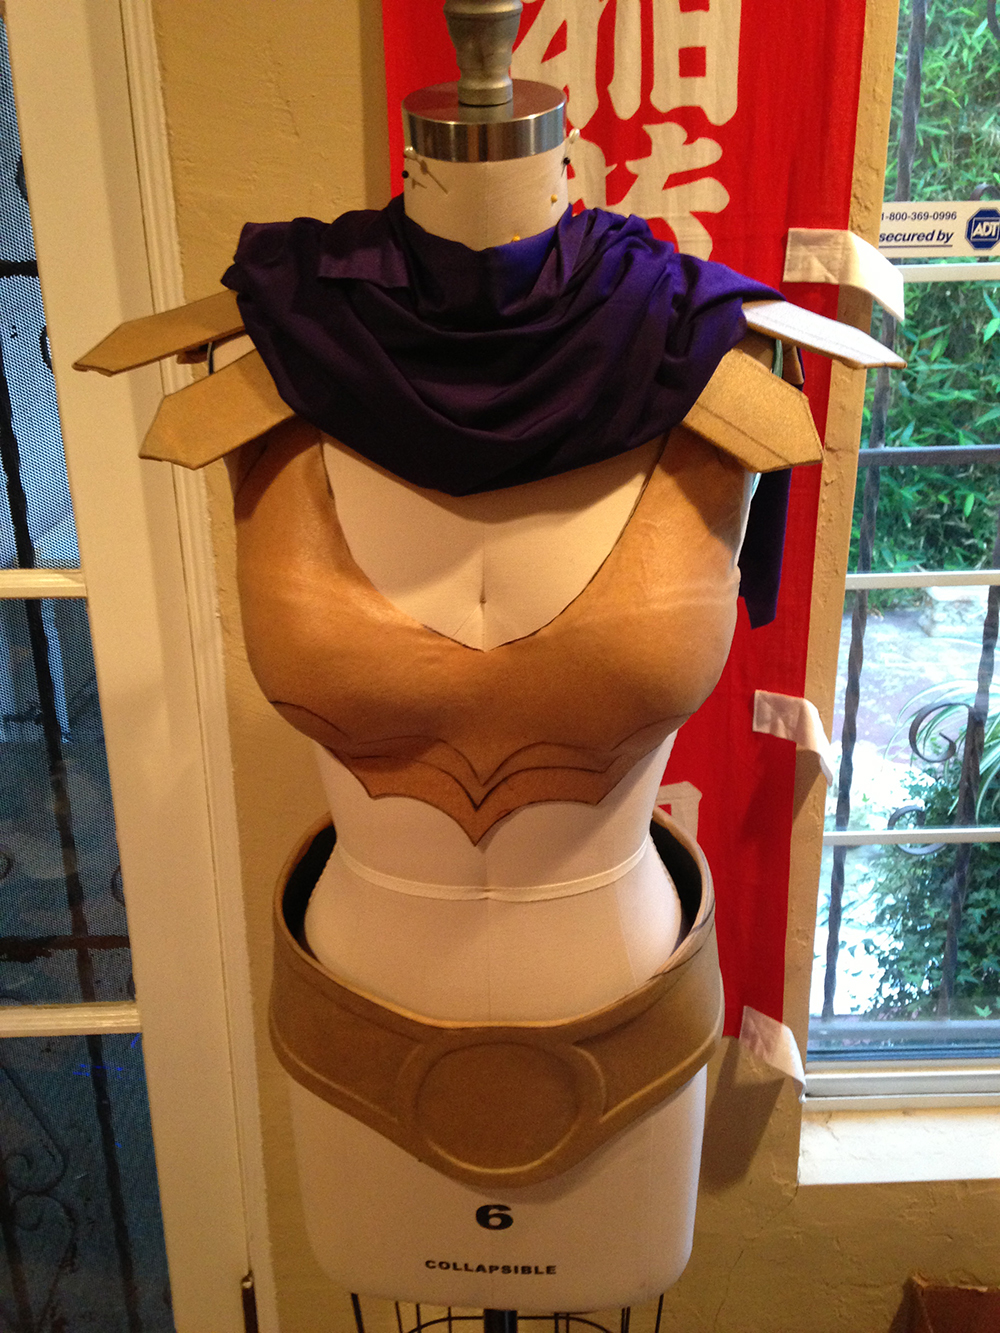
Personally, I will shape my breast plates directly over my dress form. I’ll write more about this process in another blog post, but here is the process I followed for Lady Skeletor:
– First, I drafted a base pattern from tissue paper by loosely pinning the paper to my dress foam and sketching the basic shape onto it. Then, I transferred this pattern to the Worbla and cut it out.
I then molded the Worbla over my dress form. Be very careful with this step – it’s quite easy to stretch the Worbla too thin and rip holes into it or to have bumps and creases appear. Just take your time. If you DO pull the Worbla too thin, don’t fret, you can always add an additional layer of Worbla over it to cover the error. NOTE: Worbla becomes rough when it is stretched too much. Sometimes these errors can be concealed during the priming stage – covering the Worbla with gesso or wood glue and then sanding it smooth. It will require quite a few layers of gesso to achieve this though.
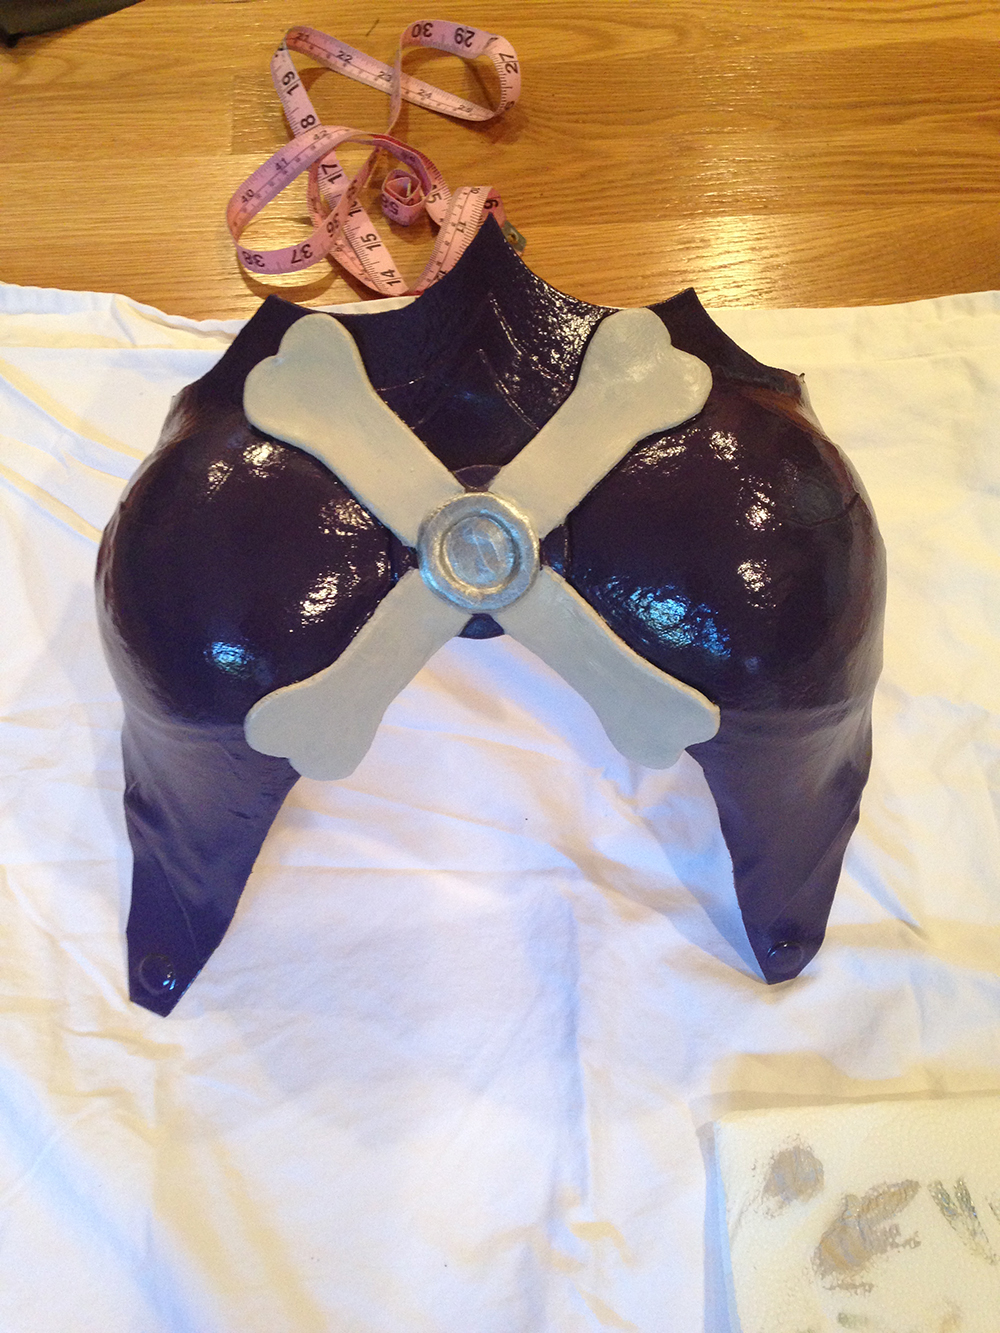
Unpainted Breast Plate – Click to Enlarge
– As you might be able to see, there are actually three layers of Worbla on my breastplate (look right beneath the bust to see them). I started with the largest piece first, shaped it over the dress form and then added the next, smaller layer, and the next, smaller layer. Worbla will stick to itself when it is warm. Once the breastplate was the shape I wanted, I let it cool before removing it from the dress form. If your bust is a different size than the dress form, you can add padding by using a push-up bra (I have to add three bras to my dress form to get it to match my bust size).

Plier Tool & Snaps – Click to Enlarge
– I then installed heavy duty snaps to the Worbla. These snaps are easiest to install in ONE layer of Worbla, so I made sure the areas where the snaps would be put in place where only one layer thick (the sides of the breast plate and the top of the breast plate). I use a Dritz Heavy Duty Plier Kit install heavy duty snaps (#5 and #105 AKA 5/8 inch snaps). The matching set of snaps were attached to elastic straps to hold the armor onto my body.

Snaps & Elastic – Click to Enlarge

Breast Plate Interior – Click to Enlarge
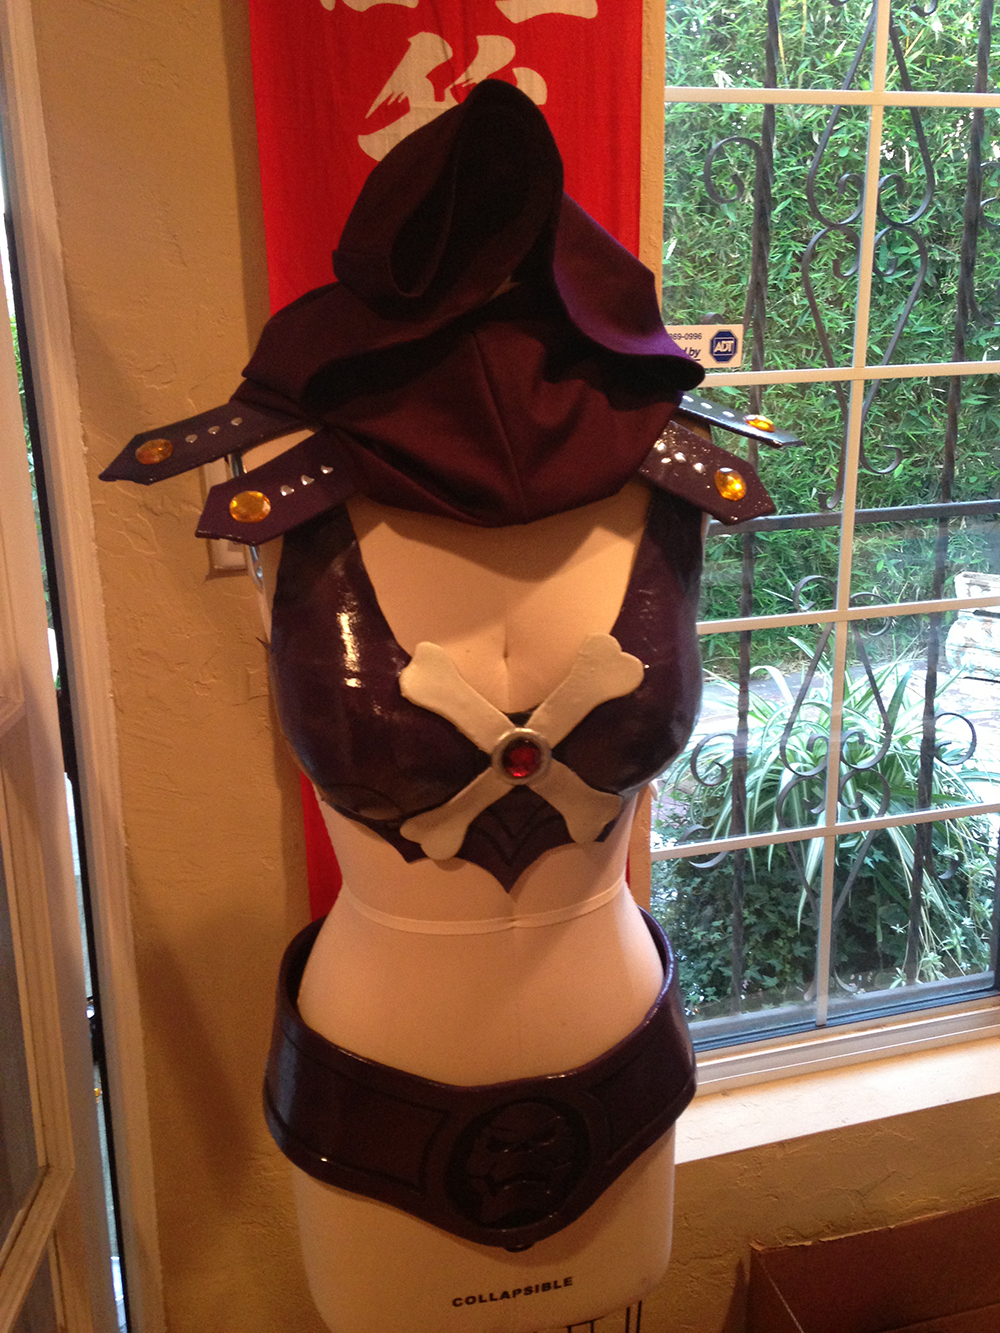
2) THE NECK PIECE
Skeletor has these armor pieces that stick out from his shoulders. Depending on the reference art you’re looking at, these either look like leather or like armor; sometimes they are straight and sometimes they are curved.
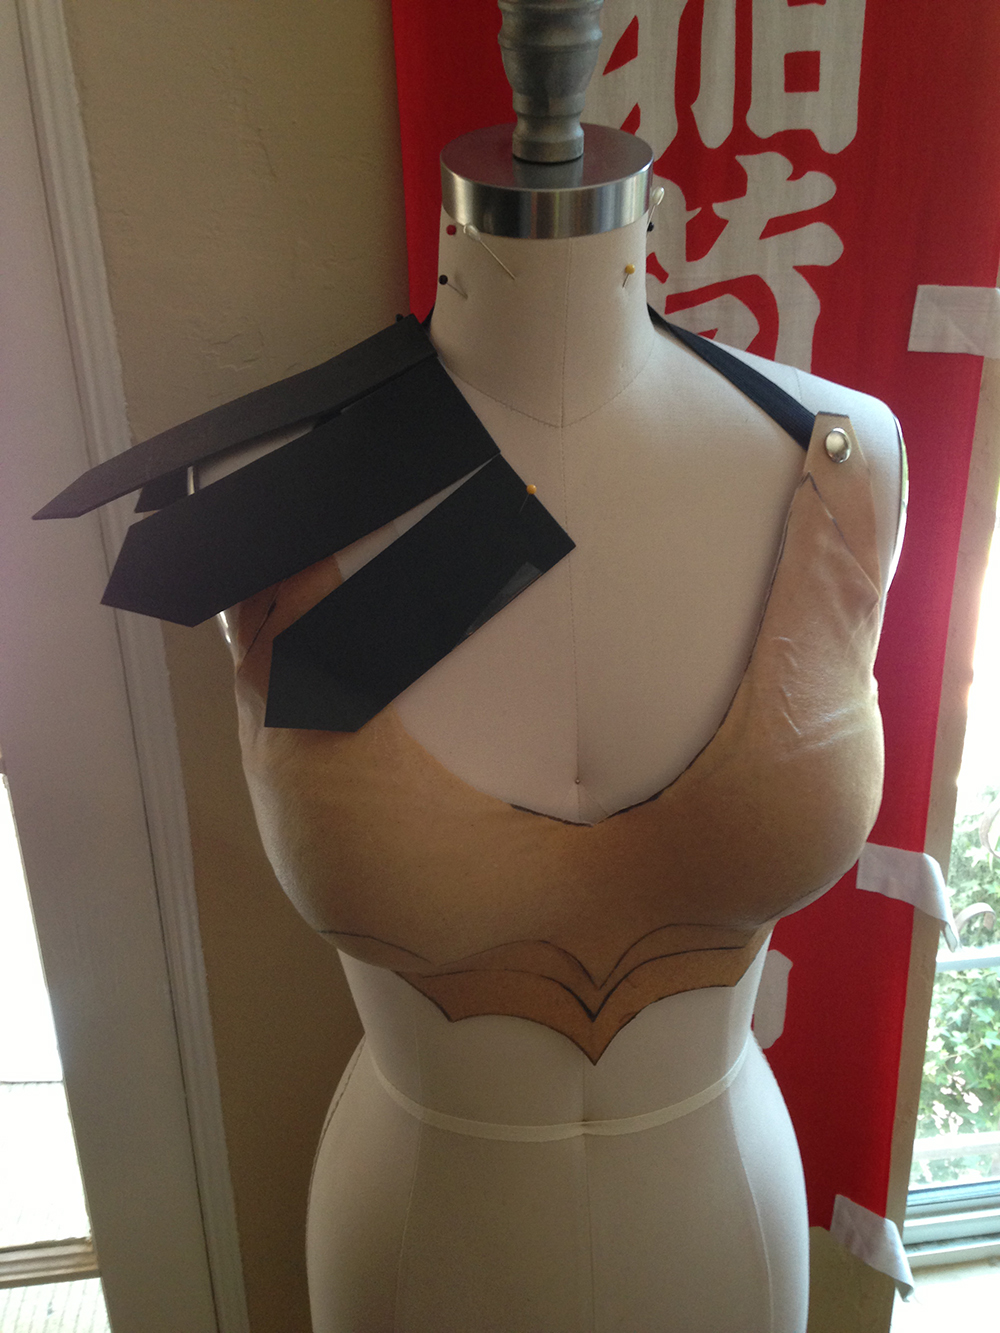
– I cut six straight pieces out of craft foam (two inches thick and of varying length). One side of each piece ends in a point, the other side is straight.
Craft Foam Spikes – Click to Enlarge
– I pinned these craft foam pieces along the neck of my dress form (and over the breast plate) to figure out how I want to position them
– I then transferred the pattern for these pieces onto Worbla, but added an extra 5/8th of an inch to each side. This is, in theory, similar to the seam allowances for clothing. You’ll need this allowance to wrap the edges of the Worbla around the craft foam.
– I heated the Worbla over the craft foam and wrapped the edges around the base craft foam piece. From the inside, this looks quite ugly. From the outside, it looks just fine.
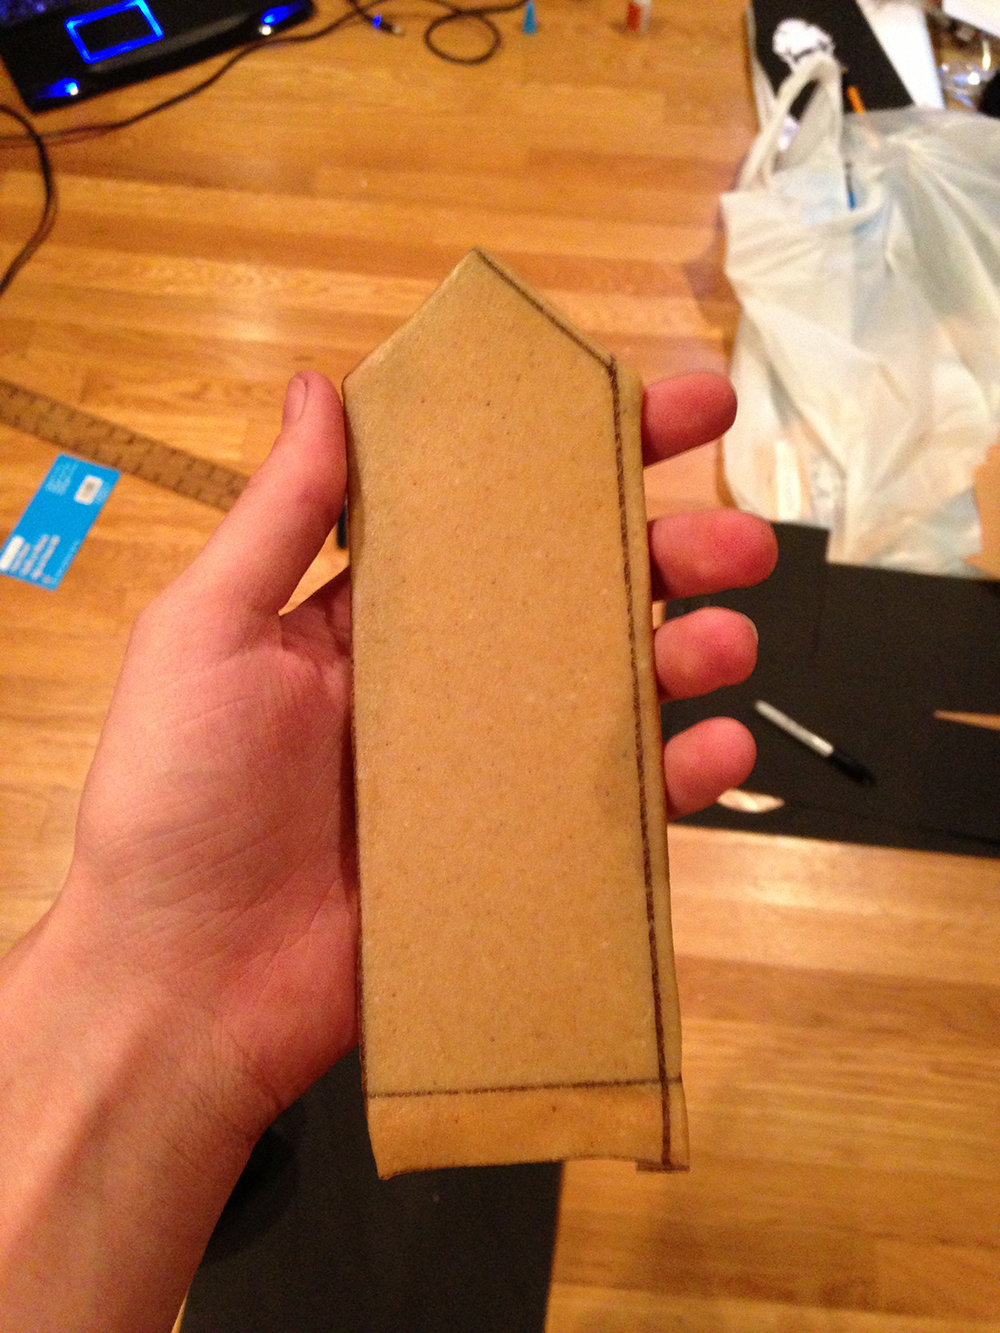
Shoulder Spike Outside – Click to Enlarge
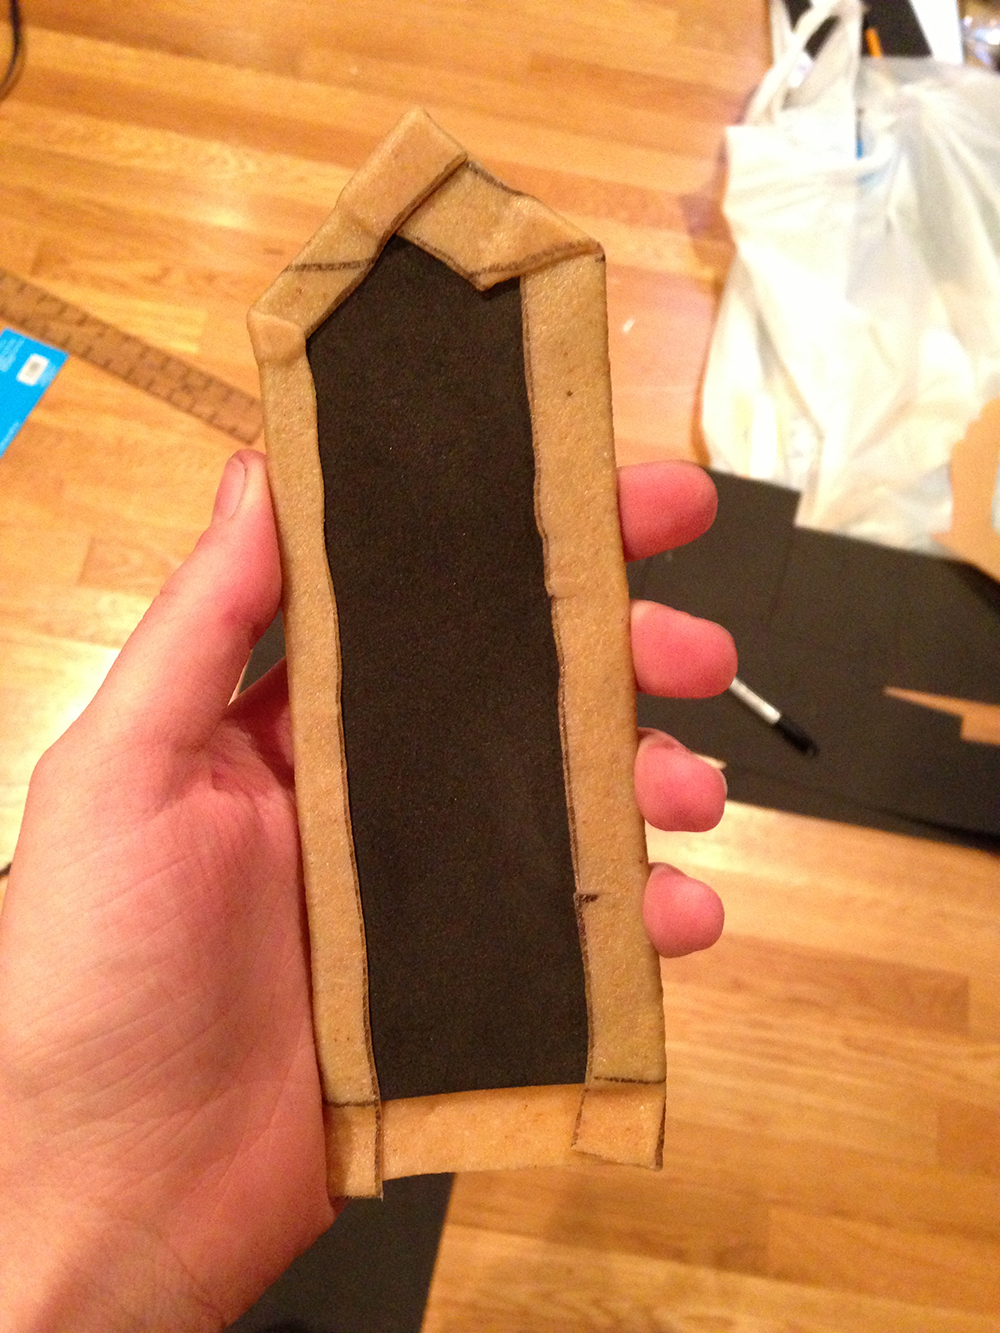
Shoulder Spike Inside – Click to Enlarge
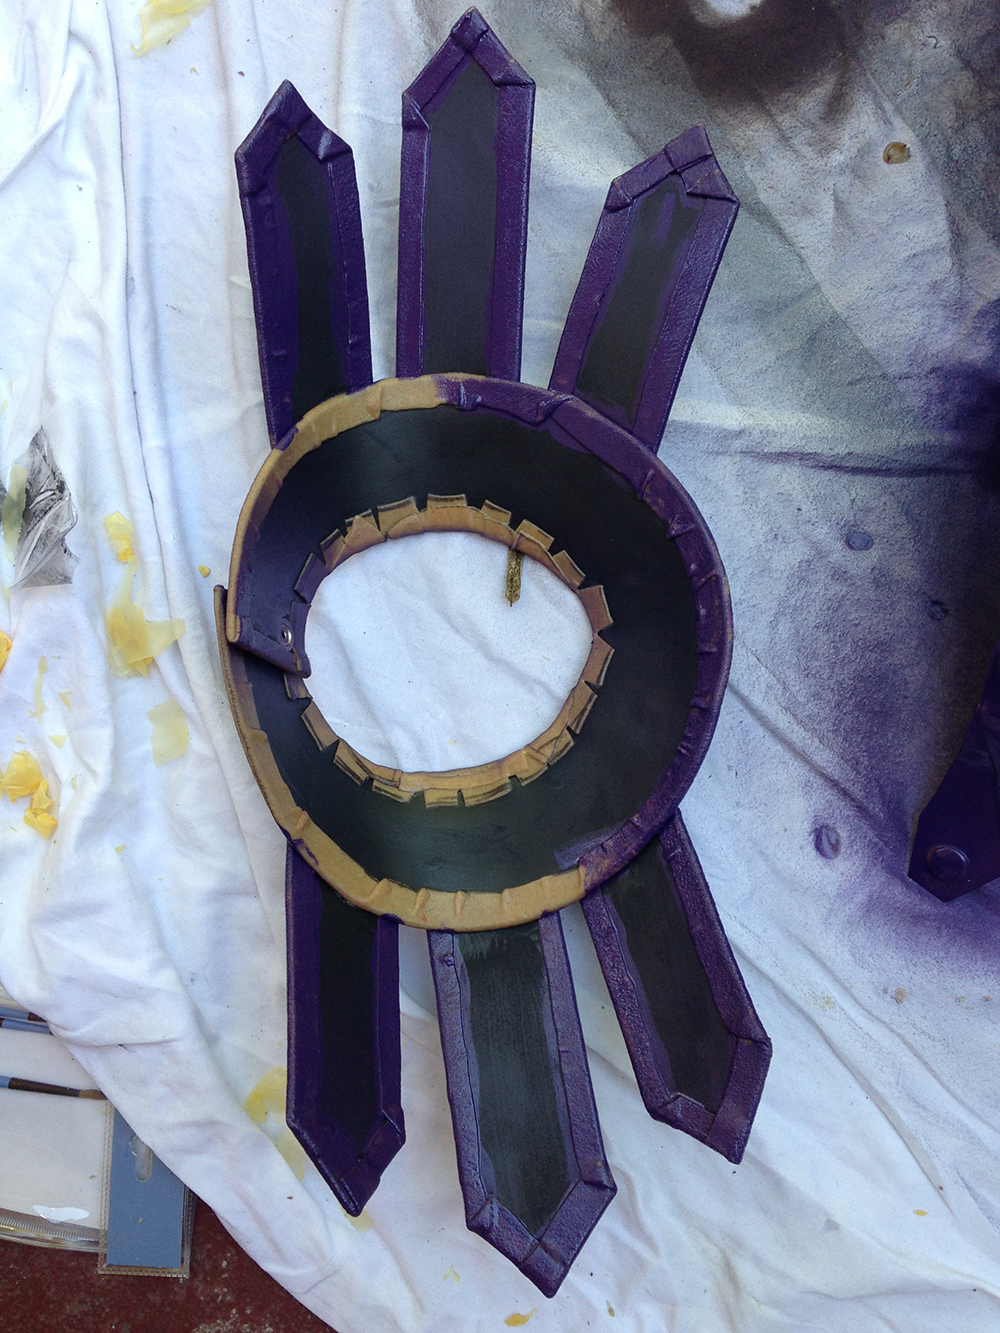
– I then cut a circular ‘necklace’ type thing out of craft foam and also covered that with Worbla. Please make sure this fits around your neck comfortably.

Finished Neck Piece – Click to Enlarge
– The Worbla shoulder pieces were then reheated and attached to this neck piece. Remember, Worbla adheres to itself when it is warm, so you shouldn’t need any additional glue to attach these pieces. Again, I wanted these shoulder pieces to be straight. If you’d like them curved, you can always form the Worbla to whatever shape you want. As you can see in the picture below, the Worbla is wrapped around the edges of the craft foam:
Neck Piece Inside – Click to Enlarge
– Finally, one set heavy duty snaps were installed at the back of the neck piece so it can be snapped in place to wear. NOTE: It is still easy to install these snaps through one layer of craft foam and one layer of Worbla.

Neck Piece Back – Click to Enlarge
3) THE BELT
Once you’ve made a breast plate out of Worbla, pretty much everything else is easy. The major difference, however, between my breast plates and other pieces of armor is that I don’t use craft foam with the breast plates (in order to get it to match the shape of the dress form as much as possible). On it’s own, one layer of Worbla is quite flimsy and hard to shape smoothly into belts, gauntlets, etc. Shaping Worbla over craft foam will help make your armor much more sturdy and easy to shape!
– I cut the base pattern for my belt out of craft foam. Craft foam can be bought at any craft store (Michael’s, Hobby Lobby, etc) and is very inexpensive. Obviously, the belt is much larger than just one piece of foam, so I cut it out in three pieces and then taped the pieces together. NOTE: Belts are NOT just straight lines. All belts are actually curved to follow the lines of your hips/waist. Use an existing belt to help you understand how it should be shaped. Once you have the belt cut out of craft foam, hold it up to your body (or your dress form) and make sure it fits you the way you want it too.
– As you can see, my Skeletor belt actually has dimension – the edges are raised and so is the circle pattern around Skeletor’s face. These were cut out of craft foam and then glued to the craft foam belt. (If this is unclear, I’ll go into more detail on this in a bit). NOTE: This is also a really good way to conserve your Worbla and – by extension – save money. Worbla is SUBSTANTIALLY more expensive than craft foam. But using a craft foam base to add in details and reinforce your armor, you can use only one layer of Worbla and achieve fantastic results!
– Once you have the craft foam base for your belt done, trace an outline of it onto a single piece of Worbla. Then, add an additional 5/8th of an inch or a full inch around that border. Remember, this is your ‘seam/edge’ allowance. You’ll need this allowance to wrap the edges of the Worbla around the craft foam.
– Heat the Worbla over the craft foam and start pressing down along the details with your fingers. Once you have the outside of the belt shaped over the craft foam, flip it over and start folding the edges inwards, over the craft foam.
– Heat the Worbla again so the entire piece is flexible. Then, form it over your hips (or your dress form) so it conforms to your shape. Let it cool enough so it will hold that shape.
Belt – Click to Enlarge
– Next, I attached two pairs of heavy duty snaps to the back of the belt. This way, I can actually snap the belt on and off when I wear it.

Belt Back Outside – Click to Enlarge

Belt Back Inside – Click to Enlarge
– Finally, I drew Skeletor’s face on a piece of paper and transferred it to craft foam. I cut the face out of the craft foam with an exacto knife and then glued it onto the belt.
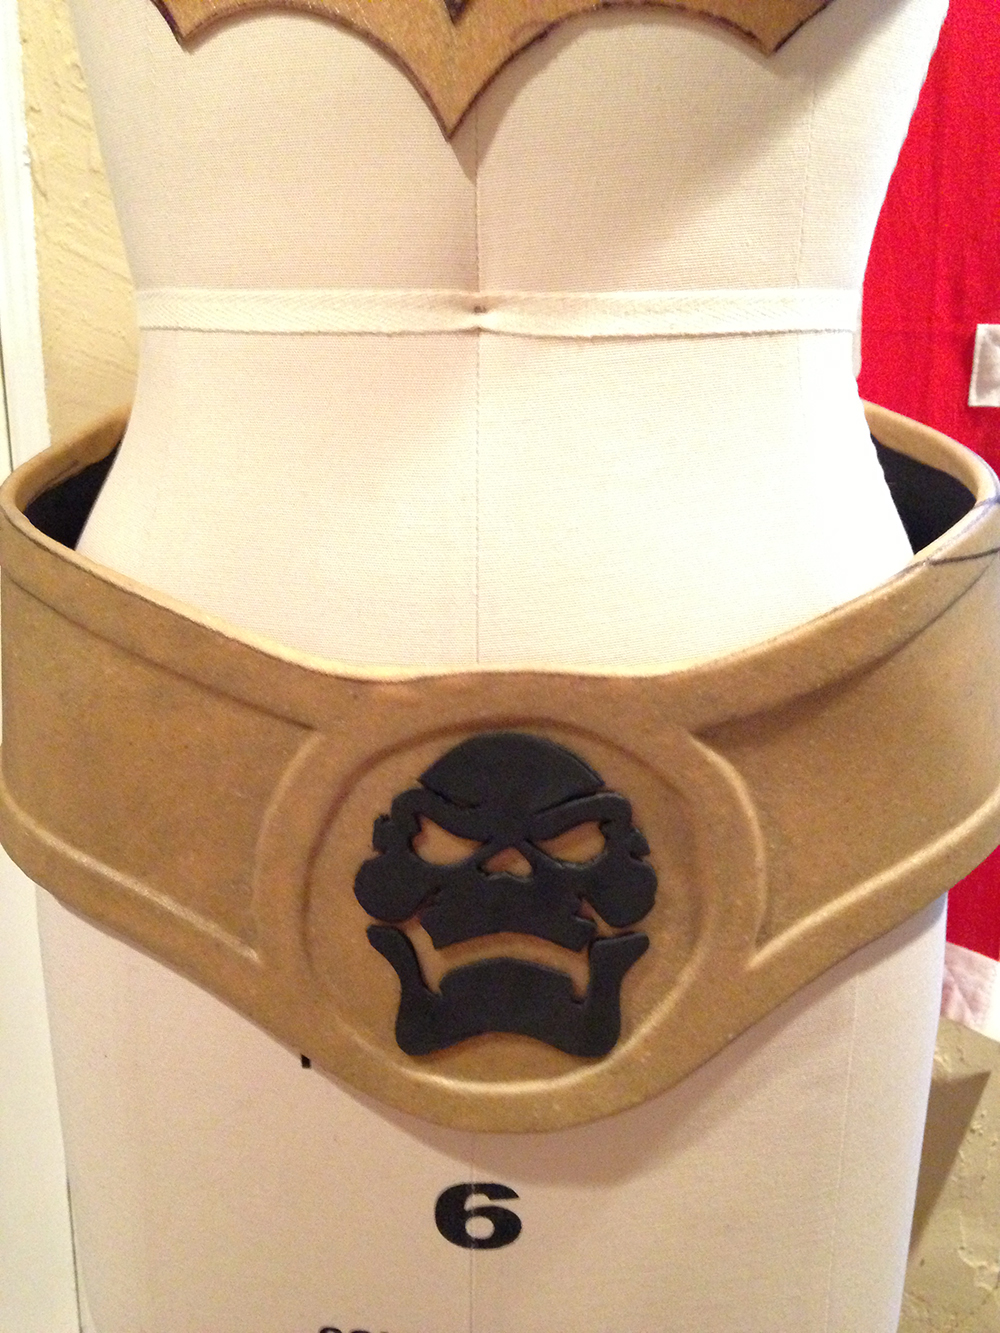
Belt Detail – Click to Enlarge
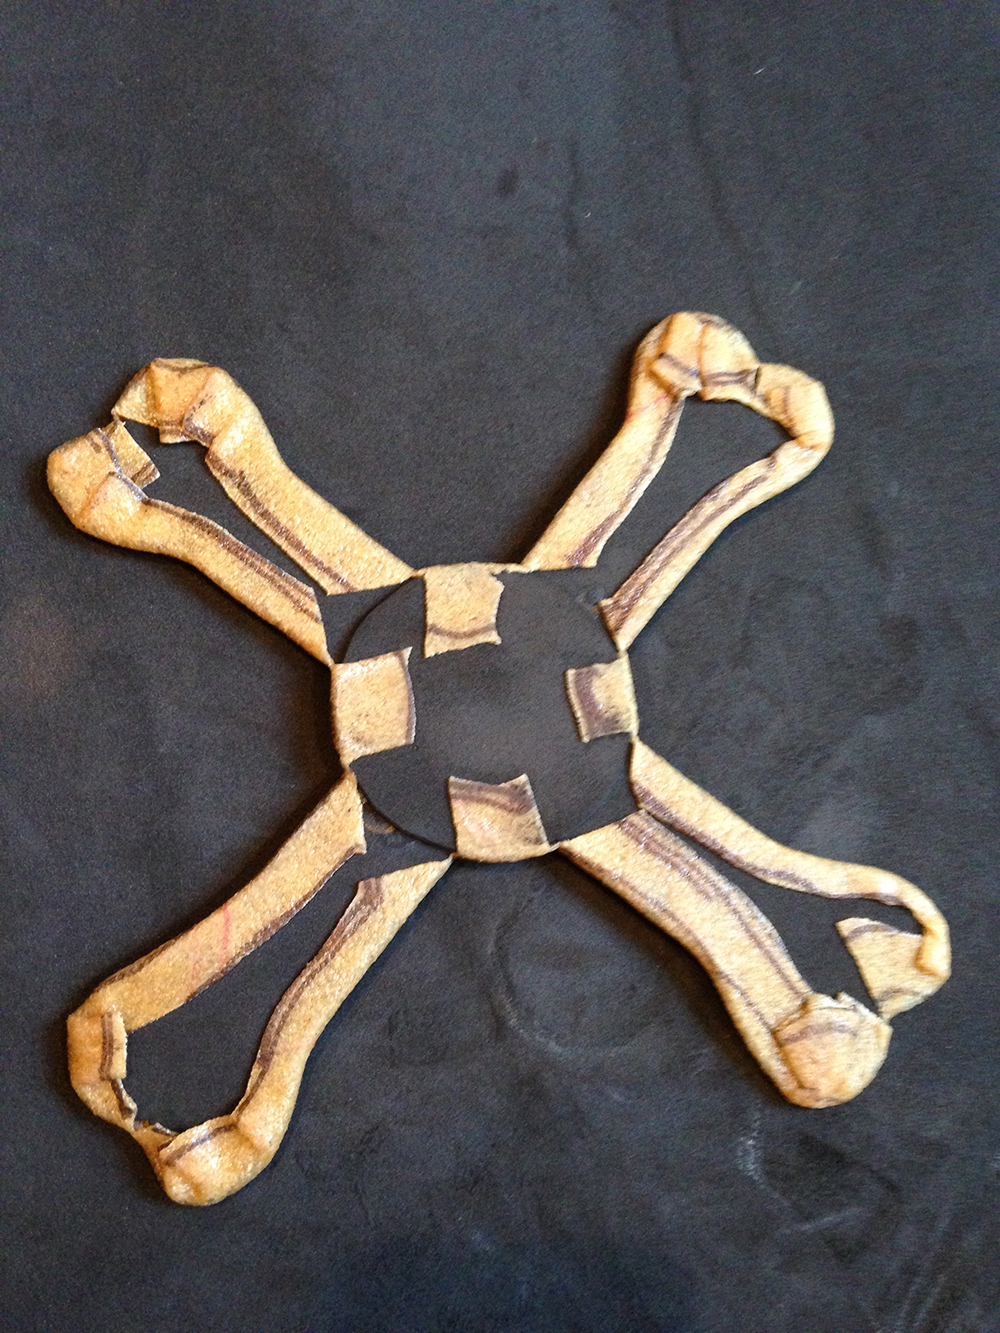
4) THE CROSSBONE DETAIL
Skeletor has a pair of crossbones strapped across his chest. For my Lady Skeletor, I decided to attached the crossbones directly to the armor breast plate and forgo the straps – I don’t feel like it’s a design element that would translate well onto a (relatively) curvy lady! For my belt, I cut out a base belt from craft foam, then cut out the raised edges, glued those details onto the craft foam base, THEN covered the whole thing with ONE layer of Worbla. The process I used for creating the crossbones is identical to this. NOTE: If I had more time, I would have sculpted the crossbones out of clay, let it dry, and then attached it to the breast plate to give them even more dimension. I had 36 hours left at this point and not enough time to make that happen.
– I drew my desired crossbone shape onto paper, then transferred it onto craft foam. Basically, I wanted a circular base, then the cross bones, then a circular ring to set the gem into. So, there are several layers of craft foam here. NOTE: Make sure the craft foam circle is large enough to place the gemstone into. Adding Worbla will make the opening a bit smaller, so cut the circle a bit larger than just the outline of the gemstone.
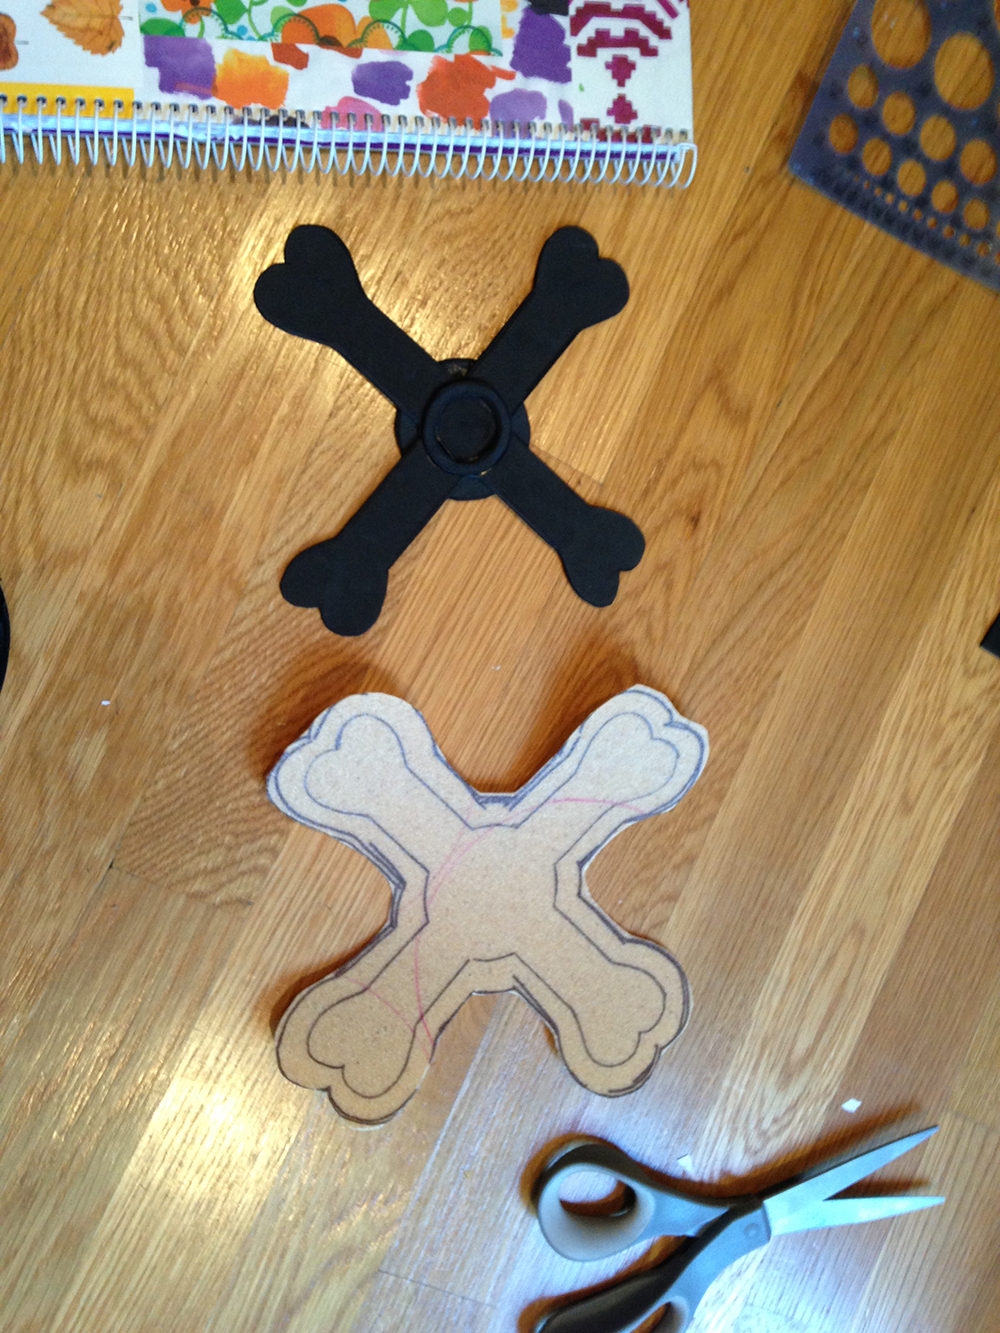
Craft Foam and Worbla – Click to Enlarge
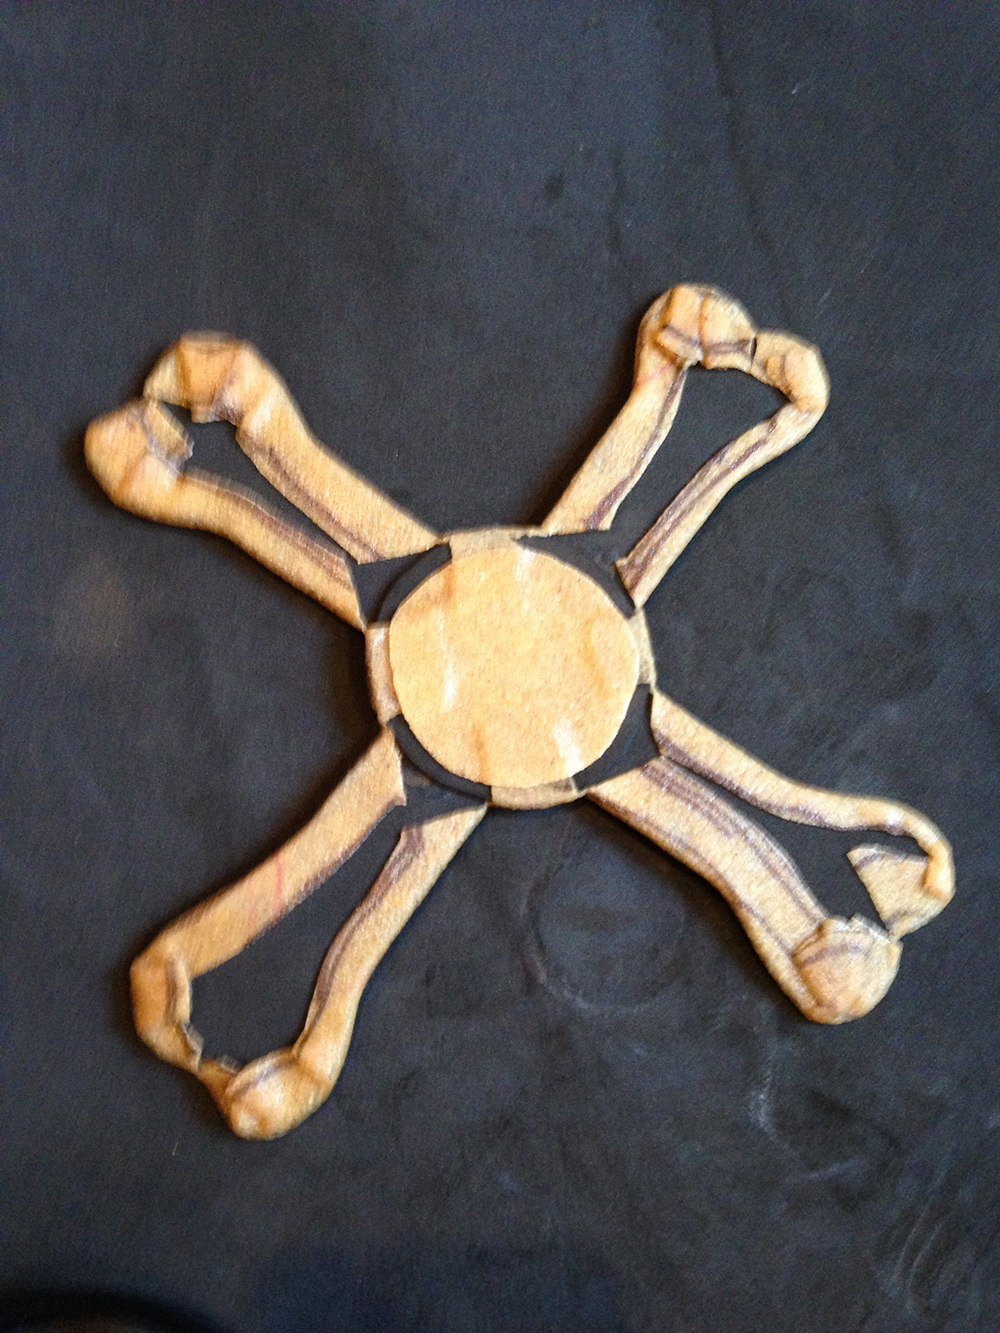
– The layers of craft foam were them glued together. I traced the shape onto Worbla and again added my 5/8~1 inch edge allowance.
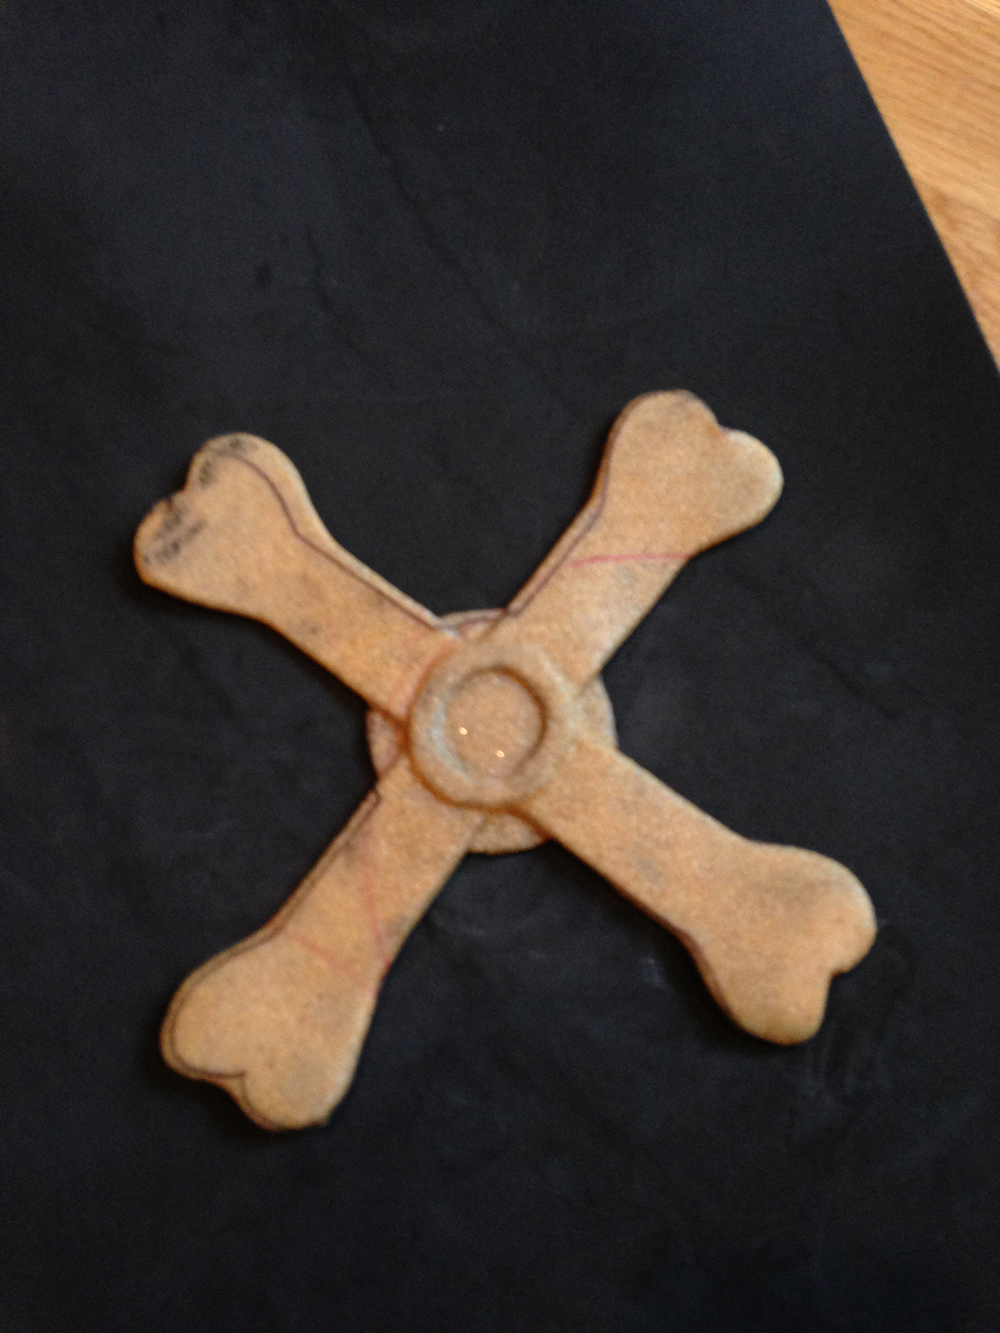
Crossbones Front – Click to Enlarge
– The Worbla was molded over the craft foam and then the edges were wrapped around to the inside.
Crossbones Inside – Click to Enlarge
– I added an additional Worbla circle to the inside of the crossbones to help it stick to them breast plate.
Additional Worbla – Click to Enlarge
– The crossbone piece was then re-heated and attached to the breast plate. The crossbones were pressed down onto the breast plate to make sure they followed the breast plate’s curves.
5) THE LEG BRACERS // LEG ARMOR
By now, you should have an idea of how these were made!
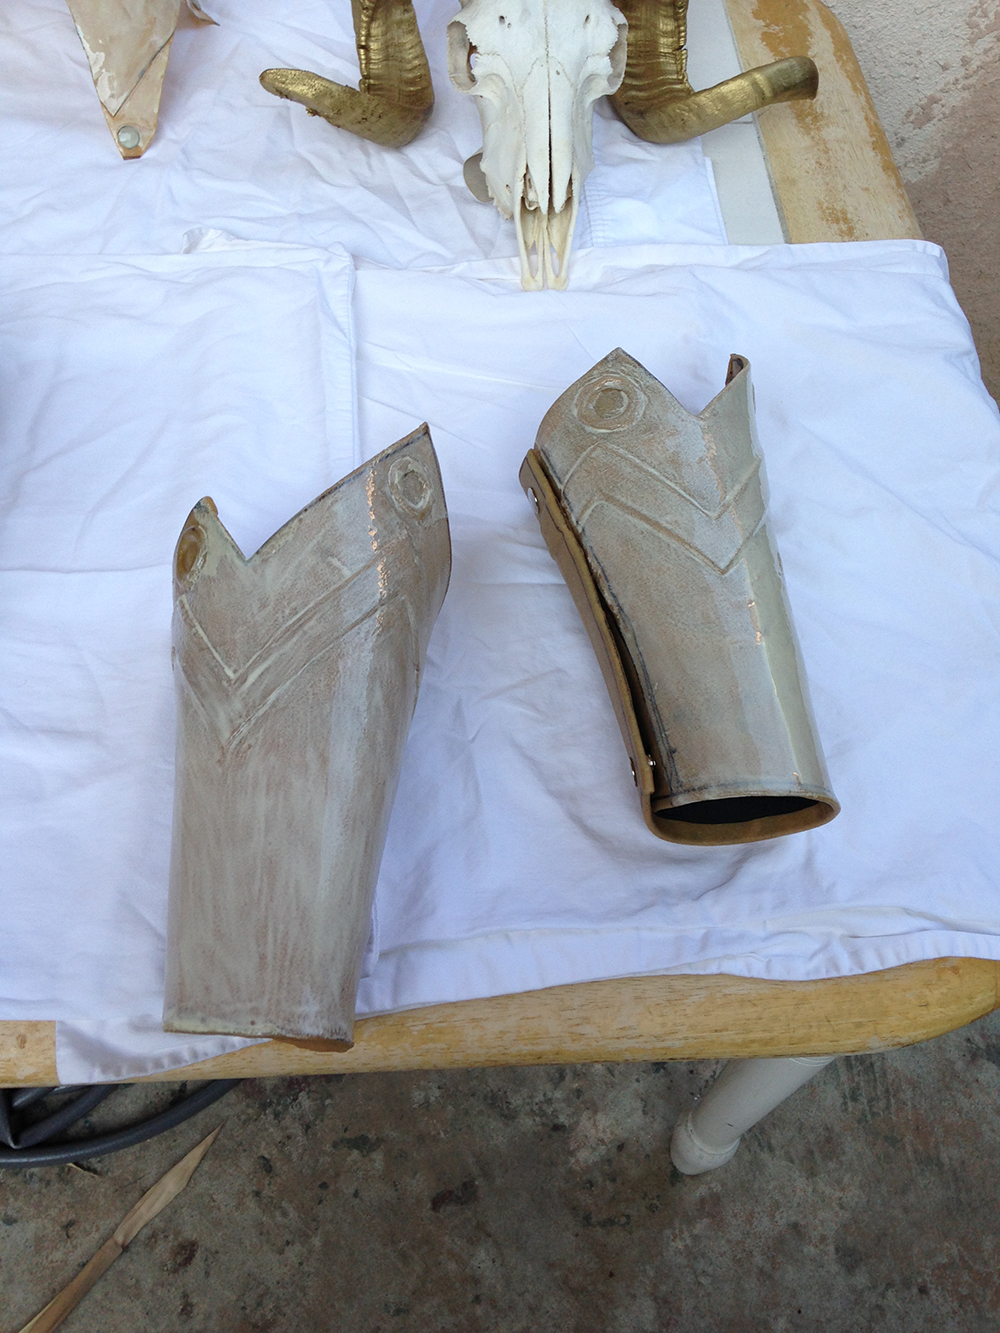
– I cut out my base pattern for the leg armor with craft foam. I added in raised details – a raised edge that mirrored the top of the leg armor and three circular inserts for gemstones on each leg piece – glued them to the craft foam base, then traced the shape out on Worbla, added the edge allowance, and shaped the Worbla over the leg pieces.
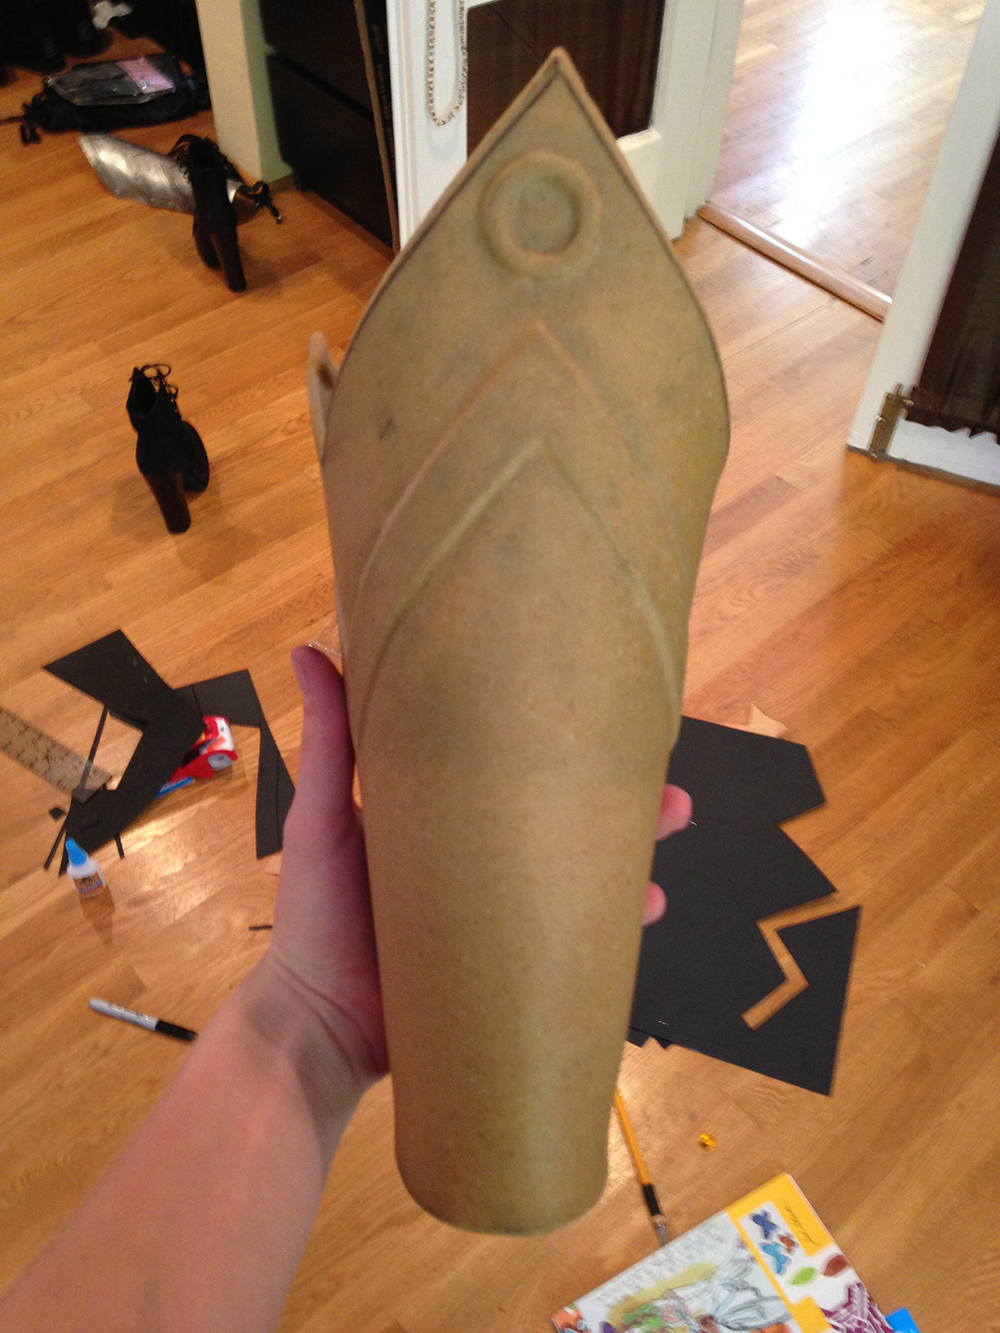
Unpainted Leg Armor – Click to Enlarge
– The leg pieces were heated so the entire piece was flexible and then shaped over my legs. The pieces were allowed to cool and then removed.
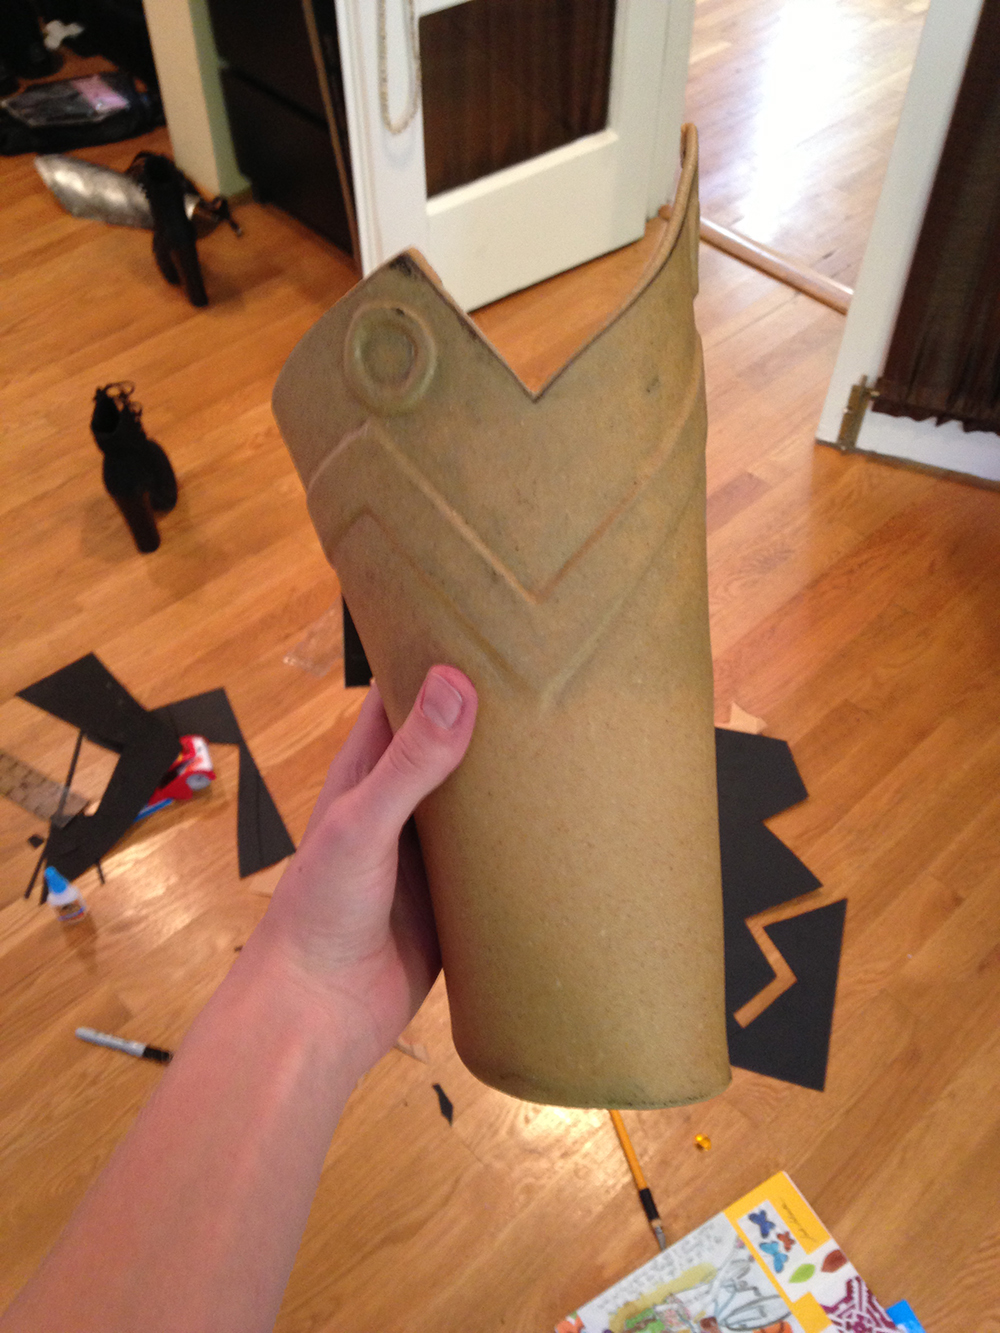
Unpainted Leg Armor – Click to Enlarge
– Heavy duty snaps were installed in the back so I can snap the leg bracers open and closed to wear.

Leg Armor Back – Click to Enlarge
6) PRIMING WORBLA
As I’m sure some of you have read – Worbla needs to be primed before it is painted. This is because unprimed Worbla looks rough – almost like painted sand (if you look at the back detail of my neck piece, THAT is unprimed Worbla. It wasn’t primed because the cowl would cover it). Of course, if you prefer this look then you can skip the priming step. But for armor, priming Worbla will help you achieve the look of metal. For other costumes, I primed my Worbla armor with gesso (a thick acrylic primer). I like gesso – I think it’s easy to paint on, it doesn’t drip or run, etc. HOWEVER, gesso still needs to be sanded before painting and I honestly didn’t have time for that. Instead, I chose to prime my armor with wood glue.
Priming Leg Armor – Click to Enlarge
Overall, I think the results were decent and priming the Worbla with wood glue definitely gave the final painted pieces a lot of shine. HOWEVER, it was very difficult to apply the wood glue smoothly. It runs very easily and kinda clumped into little bubbles. It was also hard for the three dimensional pieces that needed to be painted in stages (as in, painted, allowed to dry, then rotated and painted again) to be painted smoothly and seamlessly. I hear applying multiple coats of wood glue helps correct this and you CAN sand wood glue. Ultimately, I only applied 2 layers of wood glue. It turned out ok…I guess…whatever. I also think that wood glue is more prone to flaking off or chipping that gesso (you can see a small piece on the back of my belt chipped off.
Priming the Breast Plate – Click to Enlarge
7) PAINTING AND DETAILS
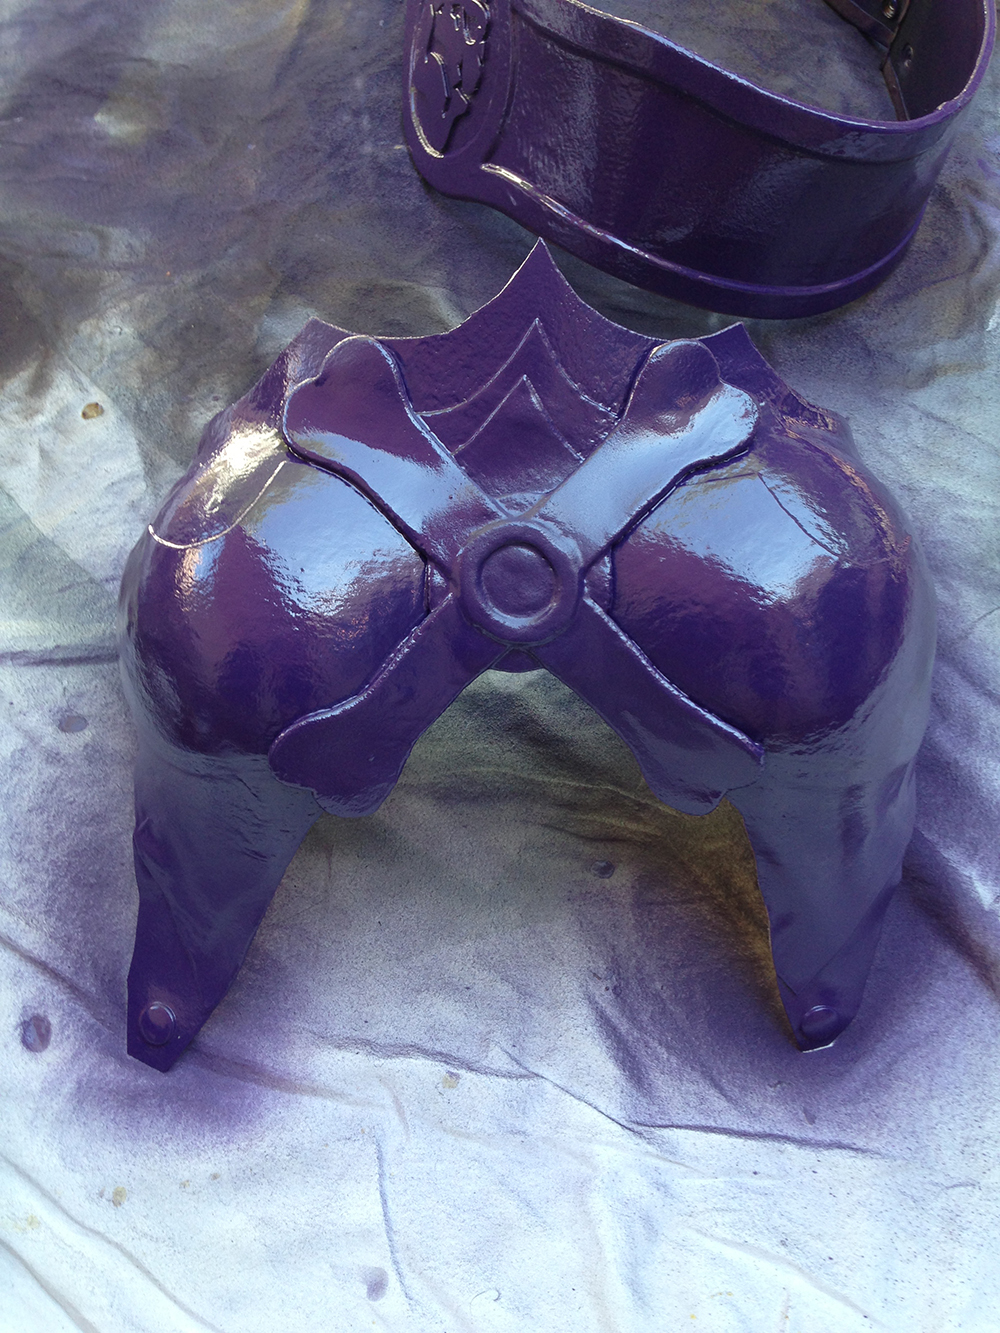
I used purple spray paint to paint all of my armor pieces.
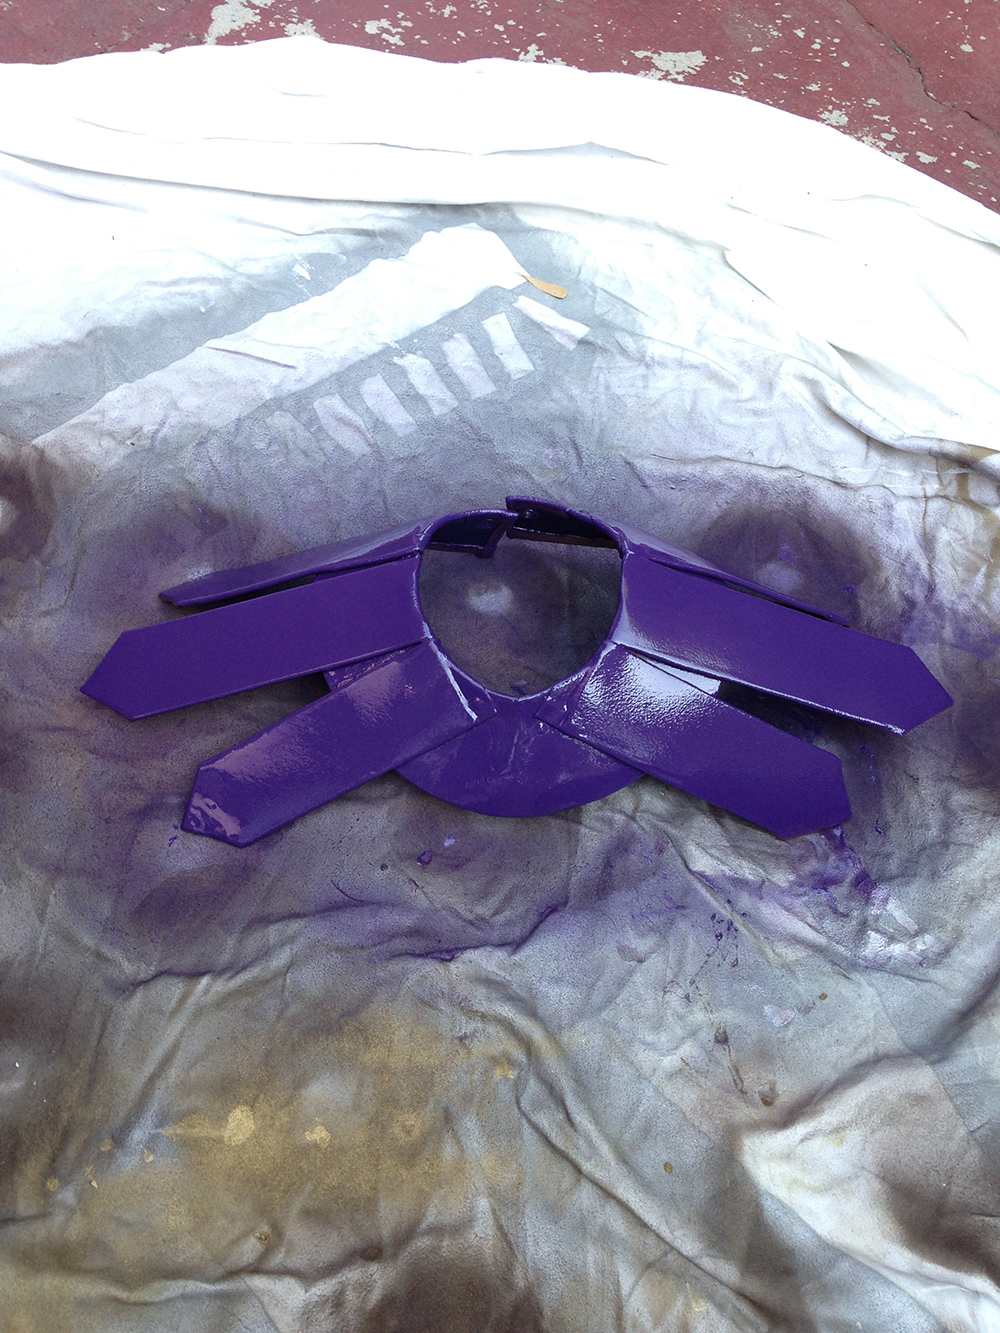
Click to Enlarge
Tips on Spray Painting – apply one coat evenly, don’t position the can too close to the armor or else the paint will run. Allow each coat to dry before applying new coats to prevent running and drips. Don’t let your armor dry in direct sunlight, the heat can cause bubbles to form.
Click to Enlarge
After the armor was dry, I painted the crossbones silver, white and black with a brush and acrylic paint. I also painted black along all of the details on the armor to help them stand out more clearly.
Click to Enlarge
I painted the recessed areas on the belt around Skeletor’s face black as well, to make the skull detail stand out more clearly.

Click to Enlarge
I glued red and yellow gemstones all over the armor – that’s the reason why the circular insets were added with craft foam. For flat areas, I used super glue. For the less flat areas, I used tacky glue (it helps fill in the gaps better than super glue).

Click to Enlarge
Click to Enlarge
After the belt was dry, I attached black fake leather strips on fabric to the inside. If I had more time, I would have added more details to these strips of fabric. Maybe I will in the future!
I wore some crazy tall shoes for the costume – they make me over 6 feet tall! MYAHHHH!

Click to Enlarge
8) THE COWL // HOOD
I drafted my own pattern for the cowl out of white cotton muslin and tried it on to make sure I liked the fit.

Click to Enlarge
I then cut the pieces of out dark purple sateen and sewed it together.

Click to Enlarge
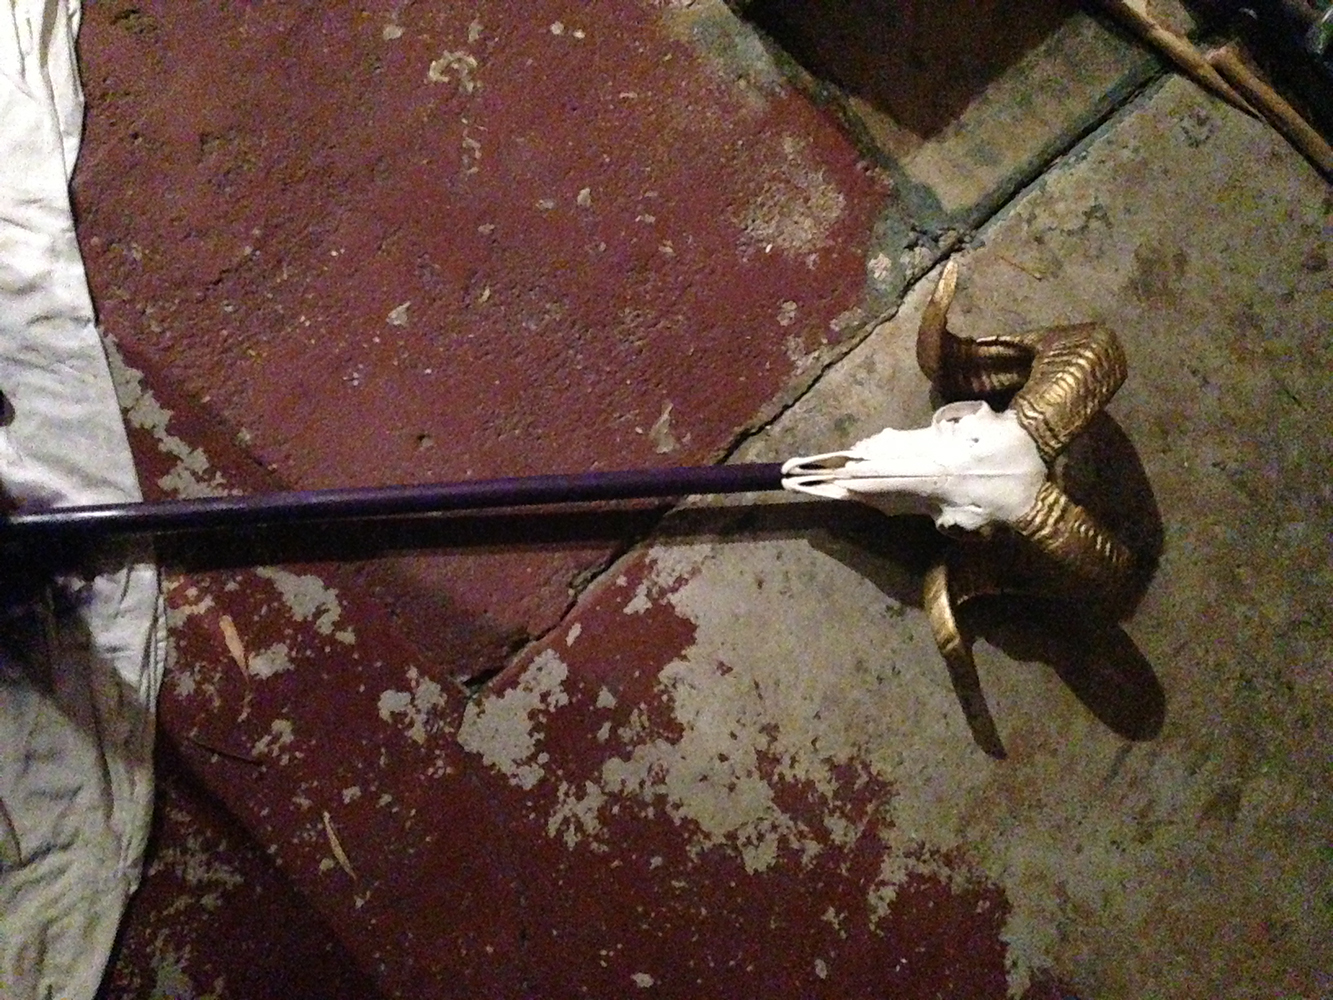
9) THE HAVOK STAFF
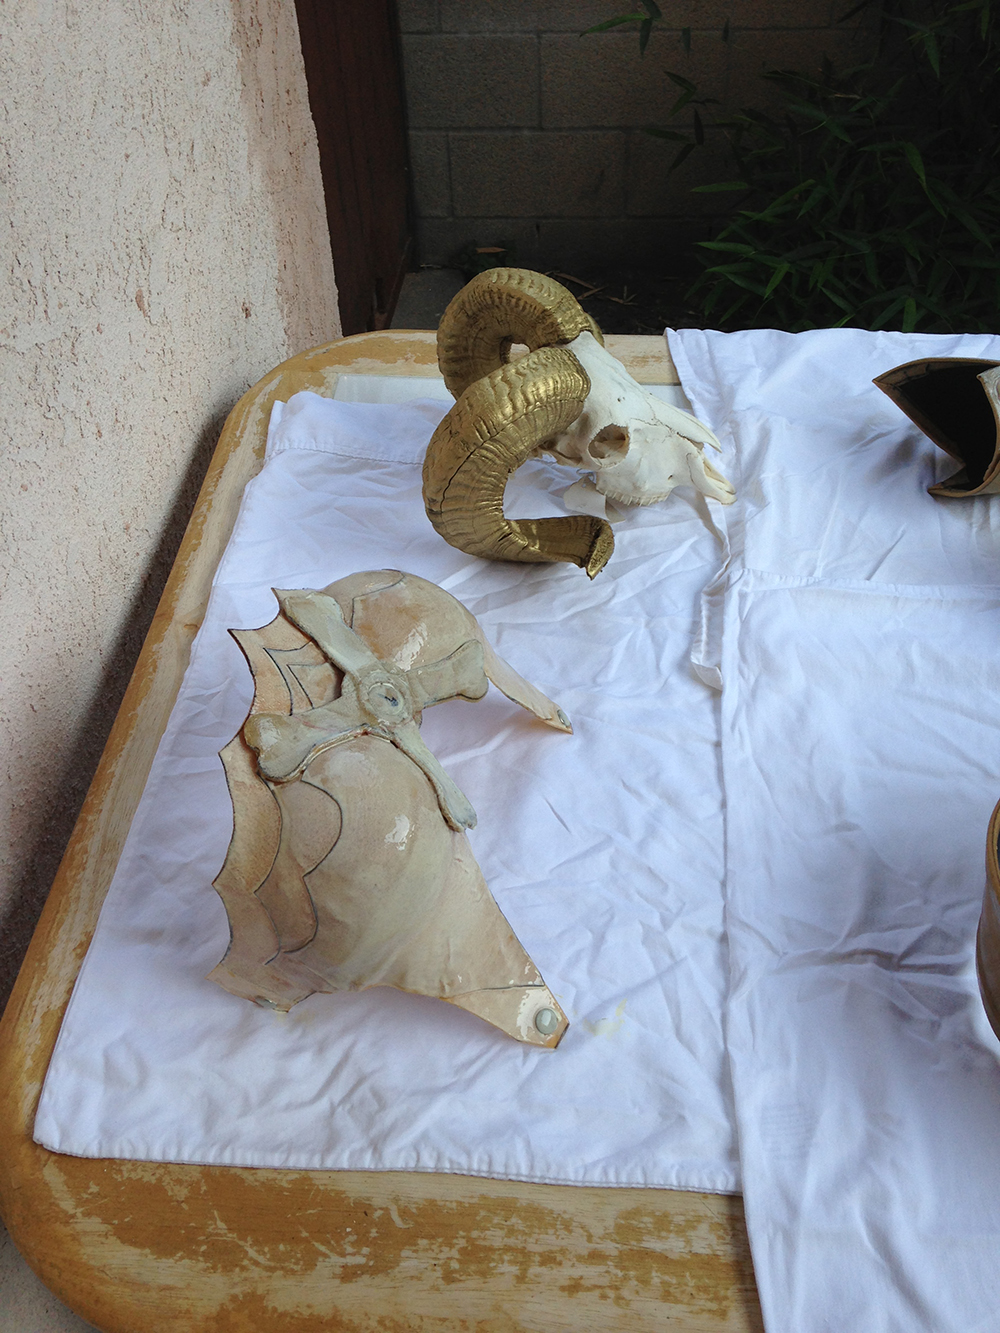
For Skeletor’s staff, I purchased a real ram/sheep skull off of Ebay. Weirdly, real skulls are cheaper than replicas. If you use real skulls, make sure they have been properly cleaned, boiled, and bleached or else they can attract gross insects.

Click to Enlarge
I paint the horns gold with spray paint.
Click to Enlarge
The skull was ultimately taped onto a 6 foot tall wooden pole (purchased from Home Depot) that had also been spray painted purple. At one point, I wanted to break a hole into the back of the skull and insert the wooden pole into it, but after hammered on the skull for about 15 minutes (while wearing safety glasses), I realized that wasn’t going to happen and also it felt a bit morbid. If I’d had more time, I would have added more details to the staff as well.
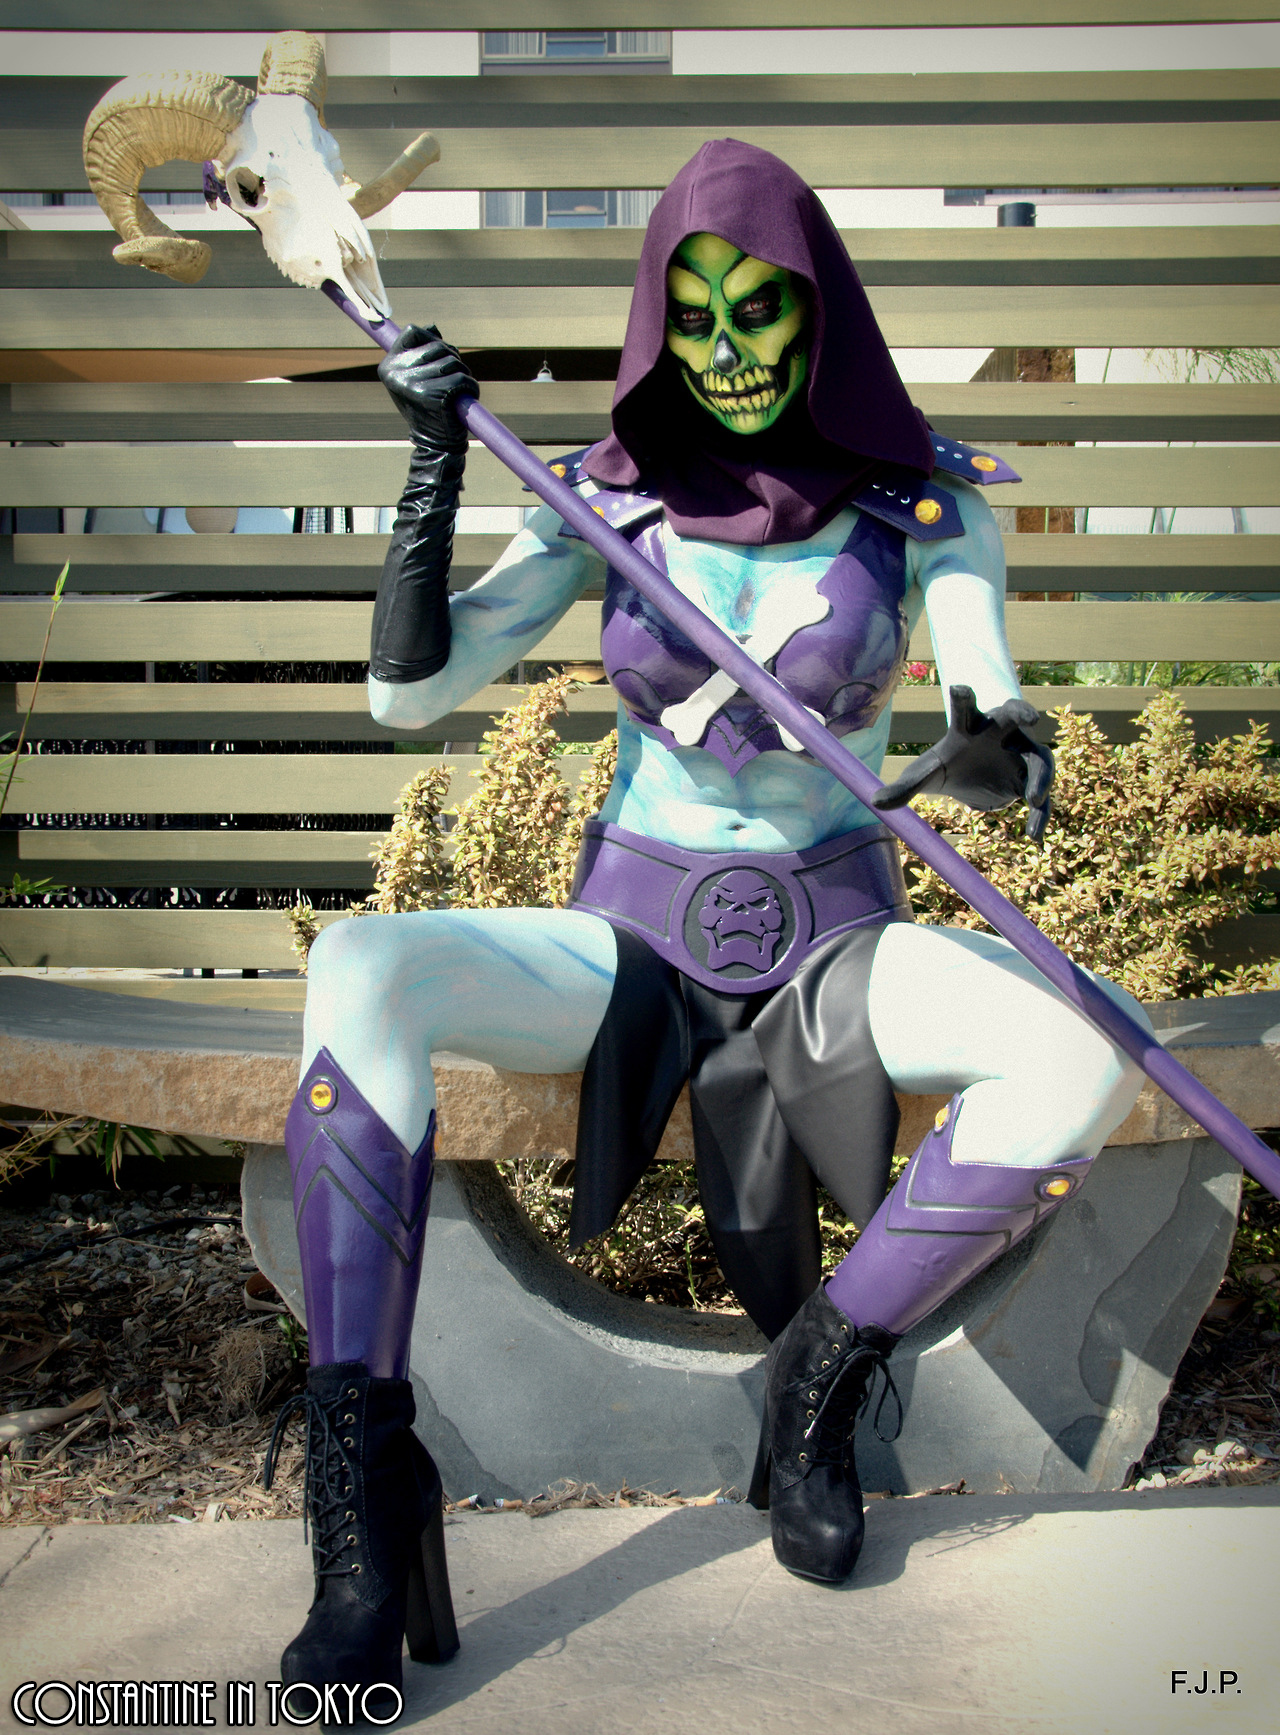
10) THE FACE/BODY PAINT

Click to Enlarge
For more information on the body paint, CLICK HERE!
THE FINISHED COSTUME:

Click to Enlarge
Click to Enlarge
Too see more images of the final costume, CLICK HERE!
Well! There you have it! If you have any specific questions about this costume, please feel free to leave a comment of shoot me an email. Thanks so much for taking the time to look over this tutorial, and I hope it helped give you ideas for your own future costumes!
XOXO,
Constantine
Tags: armor tutorial, constantine, constantine in tokyo, constantineintokyo, cosplay, cosplay tutorial, costume tutorial, costumes, craft foam, he-man, heman, making armor with worbla, masters of the universe, MOTU, skeletor, worbla, worbla armor, worbla tutorial
Re'Nell
You look stunning!
Lee-Ann
Wow! Niiiiiice job on both the costume and the make-up on your face. The make-up job is mind blowing!!! Cant believe you only had one comment before mine!!!
Sarah
Very helpful, thank you and excellent work!
Julie
Thanks for all the details. I’m a newby to worbla, but feel more confident now. 😉 Your tutorial was definitely helpful!
VanessA
This tutorial is helpful to this day. I think your cosplay looks amazing and I appreciate help from any channel. Sweet makeup too!